
Is Your Sewing Machine Crying for Help? 5 Steps to Proper Machine Maintenance (Easy Guide for Busy Quilters)

Your trusty sewing machine has been there through countless projects: late-night binding sessions, marathon quilting weekends, and those "just one more block" moments that turn into full quilts. But when was the last time you showed it some love in return?
If your machine is making strange noises, skipping stitches, or leaving you with tension headaches (literally and figuratively), it might be crying for help. The good news? Most sewing machine problems can be prevented with a simple 10-minute maintenance routine that'll keep your machine humming happily for years to come.
Let's dive into five essential steps that every quilter should know: whether you're a weekend warrior or someone who spends more time at your machine than at the dinner table.
Step 1: Evict the Lint Monster from Your Bobbin Area
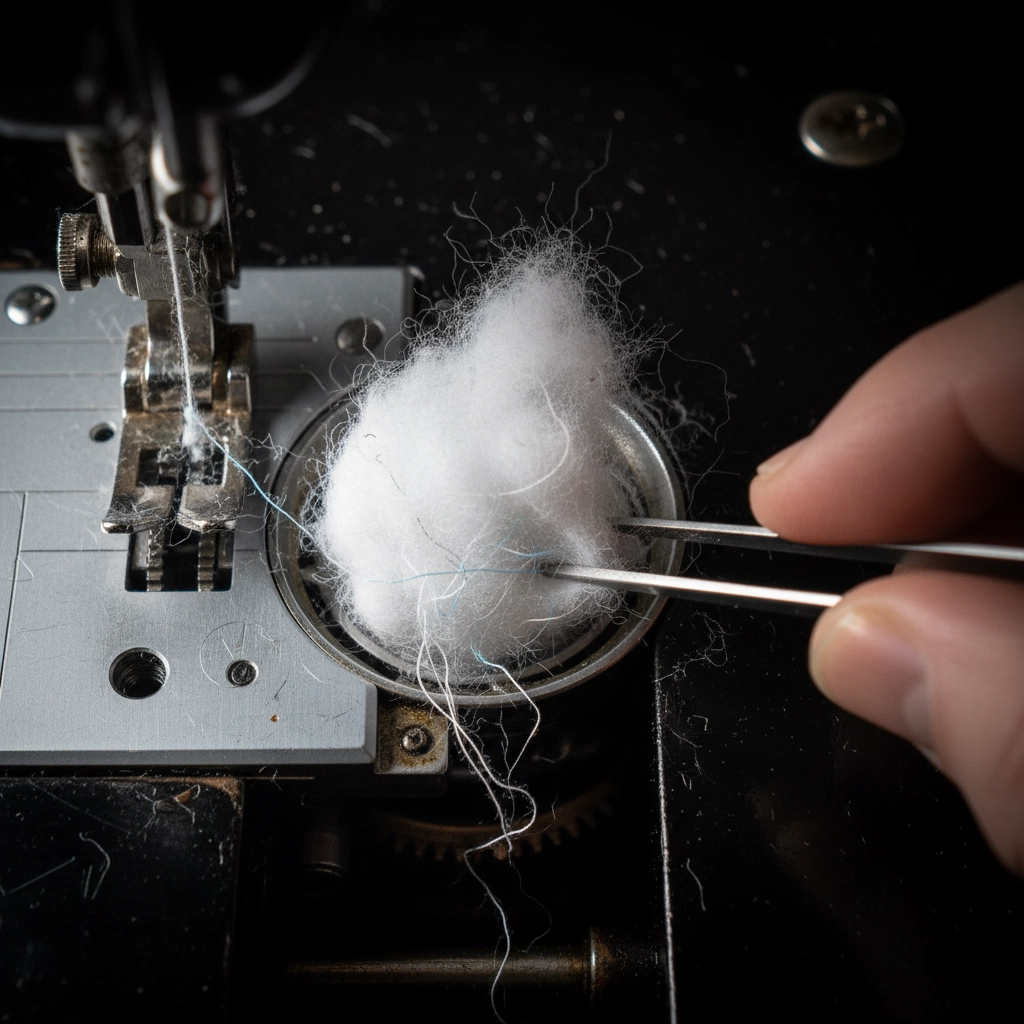
Think of lint as the dust bunnies of the quilting world: except these little troublemakers can seriously mess with your machine's performance. Cotton fabrics and threads (quilters' favorites) are notorious lint producers, and that fluffy buildup loves to party in your bobbin area.
Here's your cleaning game plan:
Start by powering down your machine completely. Remove the needle, presser foot, and bobbin. Pop out the needle plate and bobbin case: don't worry, they're designed to come apart easily. Now comes the satisfying part: use the small brush that came with your machine (or grab a clean paintbrush) to sweep out all that accumulated lint from the bobbin area, around the feed dogs, and under the needle plate.
For stubborn bits, tweezers are your best friend. If your bobbin area looks like a cotton candy machine exploded in it, you've definitely waited too long! A mini vacuum with a small attachment can also work wonders for getting into those tight spaces.
Pro tip: Take a photo of your bobbin case area before you start cleaning. You'll be amazed at how much crud was hiding in there, and it's a great reminder of why this step matters.
Step 2: Give Your Machine a Drink (Of Oil, That Is)
Just like your car needs oil changes, your sewing machine needs regular lubrication to keep all those moving parts happy. Don't worry: you're not performing surgery here. This is easier than you think.
The oiling essentials:
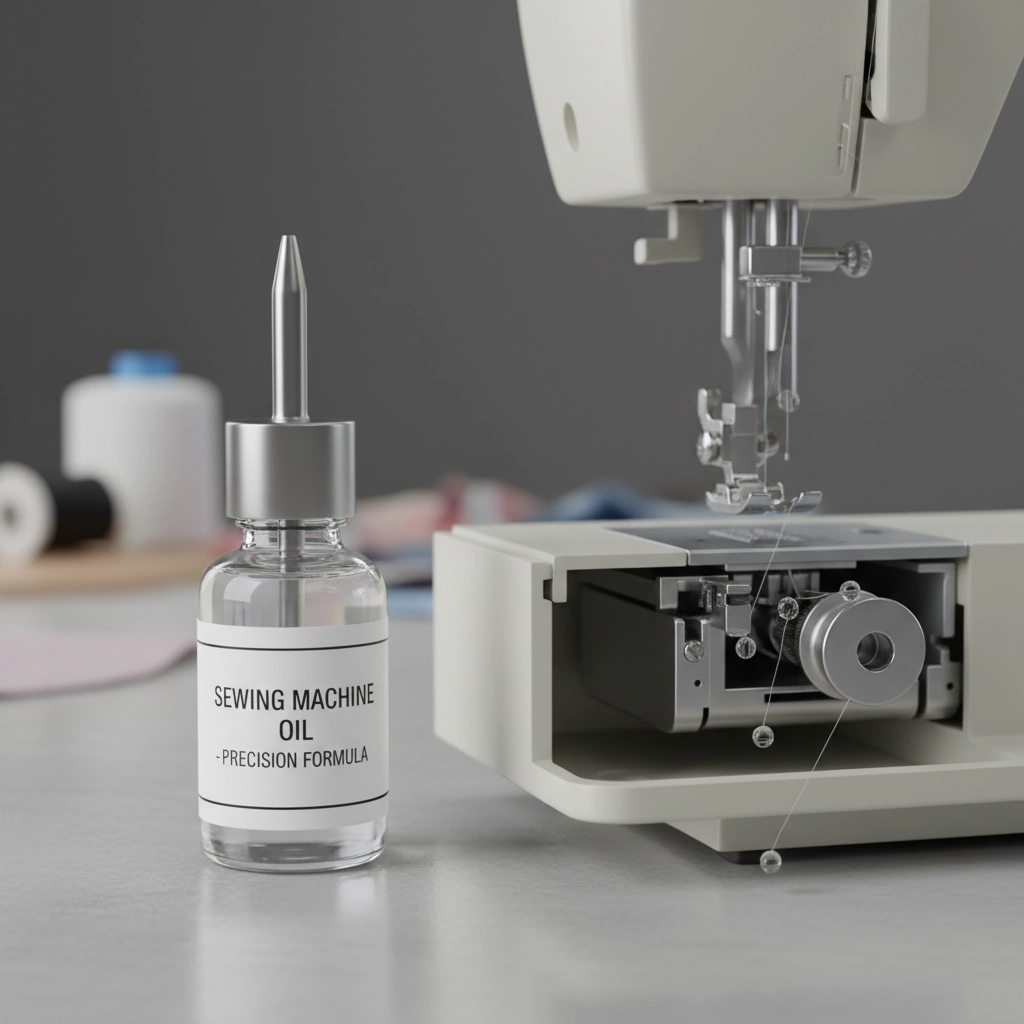
Place 2-3 small drops of sewing machine oil (not household oil: that's a big no-no) in the bobbin case area. Add a drop or two on the needle bar and where the handwheel connects to the side of your machine. Remember: less is more. It's better to oil lightly and frequently than to drown your machine in a oil bath.
After oiling, run some scrap fabric through your machine for about a minute. This helps distribute the oil and prevents any excess from ending up on your next quilt project. Nobody wants mystery oil spots on their beautiful blocks!
Where to find the right oil: We stock quality sewing machine oil here at Countryside Quilts, along with other maintenance supplies. Having the right products makes all the difference.
Step 3: Show Your Needle Some Respect
Your needle is doing all the heavy lifting, literally punching through multiple layers of fabric thousands of times per project. Yet it's probably the most neglected part of most quilters' maintenance routine.
The needle replacement rule: Change your needle every 8 hours of sewing time or at the start of every major project. For us quilters who lose track of time (raise your hand if you've ever sewn until 2 AM), that basically means every new quilt gets a fresh needle.
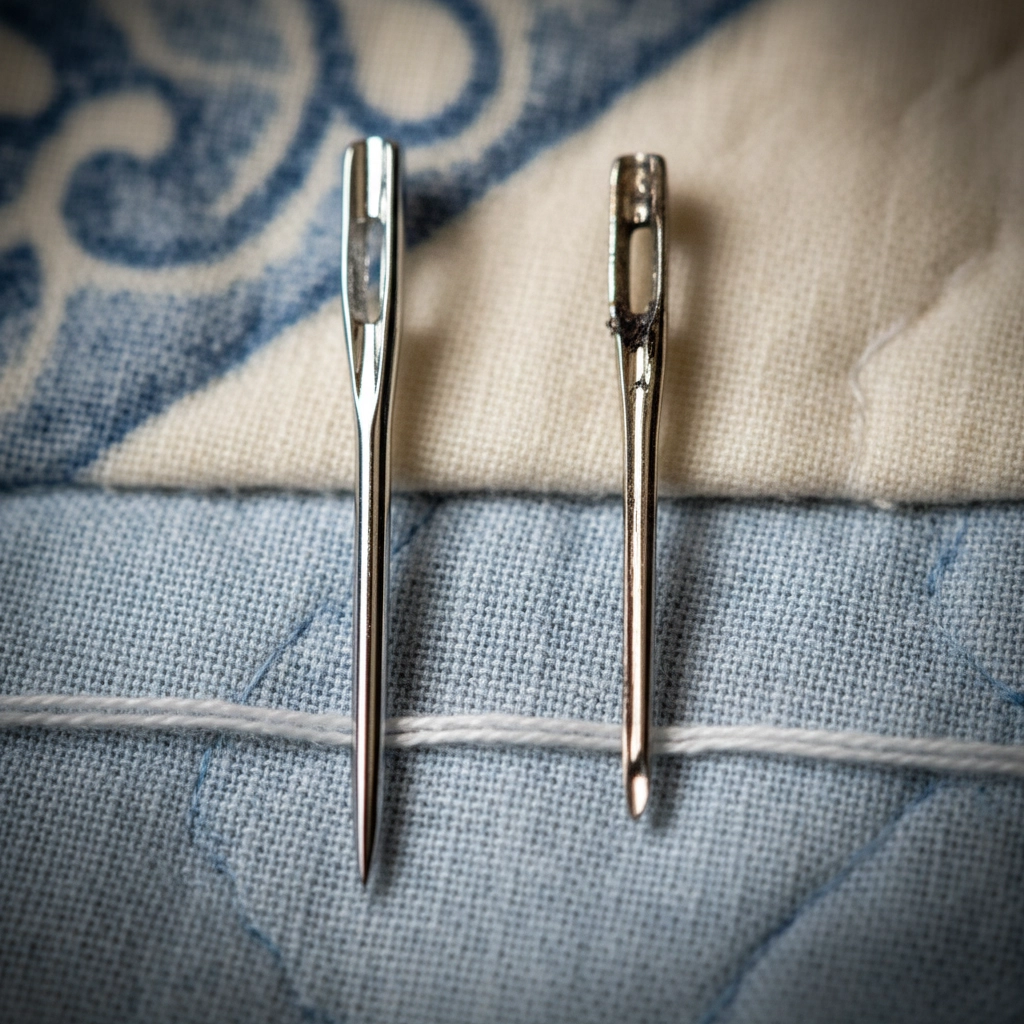
A dull or bent needle causes more problems than you might realize: skipped stitches, loops on the bottom of your fabric, tension issues, and even damage to your machine's timing. Plus, old needles can snag delicate fabrics and create pulls in your beautiful quilts.
Storage tip: Keep a small container near your machine for used needles, and stock up on the sizes you use most. Universal 80/12 needles work great for most quilting cottons, while 90/14 needles handle heavier fabrics better.
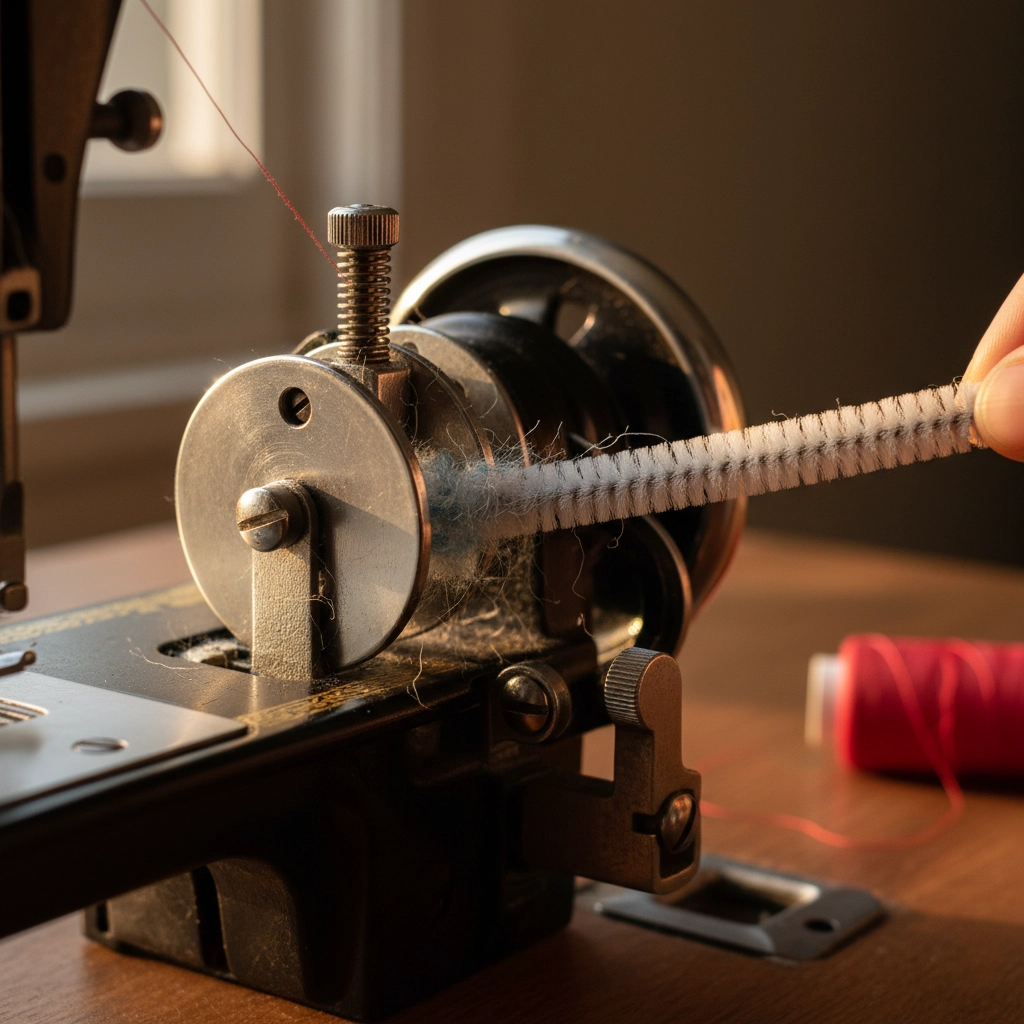
Step 4: Clean Those Sneaky Upper Tension Disks
Here's a maintenance step that many quilters skip, but it can make or break your stitch quality. The upper tension disks are like the unsung heroes of your machine: they control how your top thread behaves, but they're also lint magnets.
The cleaning process: With your machine off and the presser foot up (this releases the tension disks), gently clean between the tension disks using a pipe cleaner or soft brush. Dust, thread particles, and tiny fabric bits love to hide here and mess with your thread flow.
You'll know your tension disks need attention if you're getting inconsistent stitches or if your thread keeps breaking for no apparent reason. A quick cleaning often solves these mysterious problems instantly.
Step 5: Practice Good Machine Hygiene
Think of this as the "daily vitamins" approach to machine maintenance: small habits that keep your machine healthy long-term.
Cover up: Always cover your machine when it's not in use. Dust is everywhere, and it loves to settle into all the nooks and crannies of your machine. A simple dust cover (or even a pillowcase in a pinch) makes a huge difference.
Quality matters: Use good thread and high-quality fabrics when possible. Cheap thread sheds more, breaks down faster, and creates extra lint. Your machine will thank you, and your quilts will look better too.
Keep it stable: Make sure your machine sits on a stable surface. Vibration and movement during sewing can throw off your machine's timing and cause unnecessary wear on internal parts.
How Often Should You Do This Routine?
The frequency depends on how much you sew, but here's a good rule of thumb:
Heavy quilters (more than 8 hours per week): Monthly maintenance, or at the start of every major project.
Weekend warriors (less than 8 hours per week): Every 3 months should keep you in good shape.
Cotton lovers: If you primarily work with cotton fabrics and threads, lean toward more frequent maintenance since these materials are champion lint producers.
The entire routine takes maybe 10 minutes, and it's honestly pretty satisfying. There's something therapeutic about cleaning your machine and knowing it's ready for your next creative adventure.
When to Call in the Professionals
Sometimes your machine needs more help than you can provide at home. If you're experiencing timing issues, persistent tension problems, or mysterious noises that cleaning doesn't fix, it might be time for professional service.
At Countryside Quilts, we offer comprehensive sewing machine service to keep your machine in top condition. Our technicians can handle everything from basic tune-ups to major repairs, so you can get back to what you love: creating beautiful quilts.
Your Machine Will Thank You
Taking care of your sewing machine isn't just about preventing problems: it's about showing respect for the tool that helps bring your creative visions to life. A well-maintained machine sews more smoothly, produces better stitches, and lasts significantly longer than one that's neglected.
Plus, there's nothing worse than being in the middle of a great quilting flow only to have your machine start acting up. These five simple steps will keep those interruptions to a minimum and help ensure your machine is always ready when inspiration strikes.
Remember, your sewing machine is an investment in your creativity. A little regular maintenance goes a long way toward protecting that investment and keeping your quilting adventures smooth and enjoyable. Your machine: and your future quilts( will thank you for it.)
Leave a comment